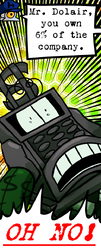
The C.F.O. in the comic "Weekly Meeting"
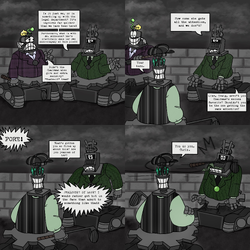
The C.F.O. featured in an official Twitter comic
A poster of the C.F.O. shown in the Schoolhouse
The Chief Financial Officer (or C.F.O. for short) is the Cashbot Boss found in Cashbot Headquarters and is available to fight once Toons have fully completed their Cashbot disguise by infiltrating the Cashbot Mint.
The exclusive reward for defeating the C.F.O. are Counterfeits. This starts with a base of 16, but can be increased by +4 by the Level 30 department boost, Boosters, and Surplus Sunday. The C.F.O. will also reward 2 Unites that can only be increased by +1 with the Surplus Sunday bonus.
After defeating the C.F.O. Toons will also be promoted to the next Cashbot Suit and will need to gain a certain amount of Cogbucks to fight the boss again.
Toons fighting against the C.F.O. will have Content Sync applied to them. They will be synced down to the following stats:
| First Cog Round | Starting Cog | Cog Levels | Cog Level Pool | Cog Amount |
|---|---|---|---|---|
| Level 15 | 7-15.exe | ~200 | ~20 Cogs | |
| Skelecog Round | Starting Cog | Cog Levels | Cog Level Pool | Cog Amount |
| Level 15 | 9-15.exe | ~300 | ~27 Cogs |
*The Cog Level Pool is the cumulative number of Cog Levels within the entirety of the battle, being split between both sides.
Starting Cogs do not count towards the Cog Level Pool.

The boss battle begins with a cutscene showing Mata Hairy, wearing a random Cashbot disguise, telling the Toons to quickly sneak into the Cashbot Vault before they are caught. As she makes her way over, the C.F.O. appears and causes Mata and the Toons to remove their Cashbot Cog Disguises. Mata continues into the vault to prepare a trap while the Toons stay with the C.F.O.

Toons will then be split into two battles (or one if there are 4 or less Toons). Cogs will spawn out of the C.F.O.'s undercarriage ranging from Level 7-15 with one of the starting Cogs being a guaranteed Level 15. The next round will begin once all Cogs have been defeated.

Once all Cogs have been defeated, the C.F.O. will make his way into the Cashbot Vault. Mata Hairy returns and calls for the Toons to go after the C.F.O. as the doors in the area begin to close.
Toons will then be split into two battles (or one if there are 4 or less Toons). Skelecogs will spawn out of the C.F.O.'s undercarriage ranging from Level 9-15 with one of the starting Skelecogs being a guaranteed Level 15. The next round will begin once all the Skelecogs have been defeated.

Once all Skelecogs have been defeated, the final battle against the C.F.O. begins. Mata Hairy tells the Toons how they can attack the C.F.O., however, afterwards she is chased off into another room by a Goon.
The C.F.O. has 1500 health. During the battle, Toons can take on 2 separate roles: craning or stomping Goons.

Six cranes are available to use with four of them being located in each corner of the room and two being located directly beside the vault doors. The corner cranes, the ones using Big Magnets, are strong and are able to lift up safes in addition to Goons. The two side cranes, using Small Magnets, are weaker and can only move around safes instead of pick them up. They can also pick up Goons, however if it is a stunned Goon it will immediately unstun and must be thrown quickly before they wiggle off of the magnet.
Cranes are used to pick up Goons to be thrown at the C.F.O. to deal damage to him as well as have a chance to stun him. Bigger Goons means a bigger chance of stunning the C.F.O.. Throwing a Goon from the side crane can further increase this chance. Once the C.F.O. has been stunned, which can be indicated by stars floating around his head as well as an Aoogah noise, safes can then be thrown at him to deal large amounts of damage.
Two safes are located by each corner crane by default. Safes do much more damage than Goons and should be prioritized while the C.F.O. is stunned. The damage done varies depending on the directness of the hit and speed of the thrown safe. Safes should only be used when the C.F.O. has been stunned, otherwise he will wear it on his head as a "safe-ty helmet". While wearing a safety helmet, all Goons thrown at him will instantly explode and deal no damage. The safety helmet can only be removed by throwing another safe at him to knock it off of him. The C.F.O. can also pick up his own safe to wear over his head if nobody has attacked him for a while.
Additionally, it is important to pay attention as to where the safes end up after being thrown at the C.F.O,. Make sure each Toon can reach a safe and that none are blocking the C.F.O.'s undercarriage. If this happens, Goons that spawn will immediately explode. However, this can be advantageous as the fight progresses if there are too many dangerous Goons at one time to prevent more from spawning.

Stomping refers to stomping Goons that the C.F.O. spawns. The C.F.O. will start with ones that are very small with yellow helmets. As the C.F.O. loses more health, bigger Goons will spawn with orange, red, and eventually purple helmets dealing large amounts of damage. To stomp a Goon, a Toon must jump on top of it. By stomping Goons, the Goon will become stunned and cannot move for a period of time, with this time decreasing with stronger Goons. Stunning Goons stops them from being able to attack Toons, as well as make it easier for people using cranes to throw them. Attempting to pick up a Goon that is not stunned will cause it to eventually wiggle off, making it difficult to hit the C.F.O,.
It is recommended that 4 Toons utilize each corner crane with the others choosing to either use the side cranes or stomp Goons. Stomping Goons is not a difficult task, so utilizing the side cranes when possible can help the battle go quickly. However, once stronger Goons (such as ones with red helmets) begin appearing, and very quickly, all 4 players not on corner cranes will need to be stomping Goons in order to not overwhelm the group.
When a Goon is stomped, it will release a random Treasure, with larger Goons releasing Treasures that heal more Laff.
Once the C.F.O. reaches 0 HP, he will attempt to leave the area. As he exits, he is hit by one of the Cashbot HQ trains and is flattened. This trap was set up by Mata Hairy while the Toons fought the C.F.O,. After this cutscene, all Toons who survived until the end will do the battle victory dance and receive their Counterfeit and Unite rewards.

The C.F.O. exiting the vault doors after defeat

The C.F.O being run over by a train immediately after exiting

| Opening Cutscene |
Mata Hairy: "Hey, you made it! Follow me to the main vault before the C.F.O. finds us!" Mata Hairy makes her way to the main vault when the C.F.O. enters the room Mata Hairy: "Blast it! We're too late!" C.F.O.: "Ah-HAH!" Mata Hairy: "Keep him busy! I'm going to set a trap!" C.F.O.: "Get them!!!" |
|---|---|
| Second Cutscene |
The C.F.O. enters the vault room Mata Hairy: "Come on Toons! Follow that bag of bolts!" C.F.O.: "I've got you right where I want you now, Toons." |
| Third Cutscene |
Camera pans over to Mata Hairy operating a crane Mata Hairy: "Control a magnet by stepping up to a podium." A goon wakes up and chases Mata Hairy out of the vault room Mata Hairy: "Eek! Gotta run!" |
| Ending Cutscene |
C.F.O.: "That's it. I've had enough of these pesky Toons!" The C.F.O. exits the vault room and gets flattened by a train. |

| Coin Throw |
|
|---|---|
| Stunned |
|

| Surrender Taunt |
|
|---|---|
| Unique Friend Request Denials |
|
| Theme | Audio File |
|---|---|
| Elevator Theme | |
| Opening Cutscene Theme | |
| Round One Cog Battle Theme | |
| Round Two Cutscene Theme | |
| Round Two Skelecog Battle Theme | |
| Crane Round Cutscene Theme | |
| Crane Round Theme (Base) | |
| Crane Round Theme (Stunned) | |
| Ending Cutscene Theme | |
| Victory Theme | |
| Epilogue Theme |

| Statement | |
|---|---|
| Question | |
| Grunt | |
| Murmur |

The C.F.O. in the comic "Weekly Meeting"

The C.F.O. featured in an official Twitter comic

A poster of the C.F.O. shown in the Schoolhouse

An album cover featuring the C.F.O. from the Pacesetter's room

The C.F.O. in the first cutscene of his fight

The C.F.O. in the Crane Room

The C.F.O. after being stunned

The C.F.O. using a safe as a helmet

The C.F.O.'s coin throw

An empty Vault Room

An empty Crane Room

An image of how many solo defeats were completed for each C.O.G.S. Boss as of July 22, 2022

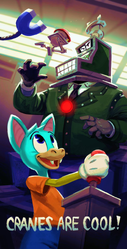
Renders of the Chief Financial Officer


