The Multislacker's battle has a maximum Cog capacity of six Cogs. Cogs summoned during this fight are all Sellbot Skelecogs ranging from Levels 9-13. They can only be spawned due to Wasteful Management and Mandatory Lunch (seen below). The Executive chance is 20%.
The Multislacker can only be Lured for 1 round.
The Multislacker summons a total of five Skelecogs from the Sellbot Tower's flight platform, landing in the middle of the fight. These Skelecogs gain a random buff alongside their Skeletal Structure buff (debuffs last for 1 less round). The following buffs that can be given are:
Damage Reduction: Cog takes -40 less damage from each Gag.
Damage Boost: Cog deals 1.3x more damage.
Overheal: Cog starts out with 25% more HP.
Soak Resistance: Cog takes -60% less damage whenever it is Soaked.
Lure Resistance: Cog is immune to being Lured.
This ability will always trigger on round 1. After the last Skelecog dies, toons are given a 2-round window to damage the Multislacker while he's alone before he uses Wasteful Management again, reduced to 1 round if the Multislacker took 800 or more damage in one round.
While there are Skelecogs in the battle, the Multislacker takes 70% less damage.
If Toons attack the Multislacker while a Skelecog is in battle, he will use his Power Tie attack for every Toon that had damaged him. This occurs at the end of the Cogs' round. Additional Toons who damaged him on the same turn will take 5/6ths, 2/3rds, 1/2 of the damage of Power Tie, rounded up. If the Multislacker is Lured into a Trap Gag when this cheat occurs, he will hit the person who lured him into the Trap instead of the person who placed the Trap. The attack itself can miss any Toon it targets.
If attacks in different tracks hit the Multislacker, the Toons using higher tracks will take more damage than the Toons using lower tracks. However, if there are two or more Gags in the same track hitting the Multislacker, the damage received by Toons will depend on whoever clicked the Gag last. For example, if four Drop Gags are used on the Multislacker, the first Toon to pick the Gag will take 25 damage, while the last Toon to pick the Gag will take 13 damage.
If the Multislacker is not attacked (includes luring him) while a Skelecog is in the battle, the Multislacker will give a sandwich to the other Skelecogs, healing them 40 HP. If three or more Cogs are healed, the Multislacker will not attack in that turn. If there are none present, he will heal himself for a tiny amount (and still attack the Toons). This heal can cause Overcharge.
The Multislacker steps away from the fight to have his lunch break. This will trigger at 1920 HP (60%). During a lunch break he is intangible and cannot be hit at all. While he's busy munching on a ham and cheese sandwich, two high level Factory Foremen will drop in alongside 3 Skelecogs getting the same random buffs from Wasteful Management. Both Foremen will spawn in the center of the fight, with two Skelecogs on the left and one Skelecog on the right. When the side Cogs are defeated, there will be 3 additional Skelecogs that spawn into the battle and no more after. The Multislacker will return to the battle after 3 rounds or if both Factory Foremen are destroyed.
A Factory Foreman can be one of three levels shown below. The lunch break will never summon two of the same level Factory Foreman. They will have a unique cheat based from the level, the random buff that the other Skelecogs get, and the classic Worker's Compensation. Whenever another Cog dies (including the second Foreman and the Multislacker), Worker's Compensation heals all Foremen for 75 HP and gives each a 1.15x damage boost.
Focused Defense (Level 19.mgr, 650 HP): The Factory Foreman takes 50% less damage from the first Gag Track used on the Foreman in this turn. For example, using Trap and two Drops, the Trap will have its damage reduced, while the two Drops will not; using Lure and three Throws will reduce the damage of each Throw Gag. Lure does not count as an attack and will not factor into the 50%.
Worker Management (Level 20.mgr, 800 HP): At the end of each round, the Factory Foreman cleanses all negative effects from the two adjacent Cogs. This cleanse occurs during the Cog round (after the Foremen have used up their attacks), so if any lured Cogs were cleansed they will be able to attack in the same round.
Union-Bust (Level 21.mgr, 950 HP): Two rounds after he is summoned, the Factory Foreman will destroy every Skelecog that remains at the end of the round (excluding the neighboring Factory Foreman). This triggers a much stronger Worker's Compensation (200 HP and 1.15x more damage) for every Skelecog. Union Bust will only happen once. If Cogs are killed via other means on that turn, the Foreman will not get Worker's Compensation. However, he will still be able to use the regular Worker's Compensation for every destroyed Skelecog after the Union Bust turn.
This ability has priority over all other abilities. For example, if Multislacker is alone for 1 round, but Toons put him below 1600 HP, Mandatory Lunch will trigger instead of Wasteful Management.
Important for keeping you and your teammates alive. The Multislacker, the other Cogs, and especially the Foremen are capable of doing a lot of damage together. While you could rely on Unites and Prestige Throw for healing, they may not be enough when things go south and your team is backed into a dangerous situation.
Rating: 3/3 Stars
The improved self-heal can lower the need for additional Toon-Up Gags and Unites over the course of the battle. At the same time, base Toon-Up can usually do well on its own, especially if multiple Toons have it. The extra round of Cheer could help with the consistency of Lure + Throw, Lure + Trap + other Gags, and Squirt/Throw and Drop turns against the Multislacker and the Factory Foremen.
Very valuable for being effective at picking off Wasteful Management Cogs and can assist in taking down the Factory Foremen, assuming they don't have Lure Immunity.
Rating: 3/3 Stars
A solid Prestige for enabling kills on larger Wasteful Management Cogs and dealing more damage to the Factory Foremen.
Greatly effective and important here for its ability to stall the Cogs for multiple turns in all phases (except those with Lure Immunity, naturally), and allowing Throw to deal high target damage against the Multislacker and the Factory Foremen.
Rating: 3/3 Stars
The Prestige could provide the extra damage needed to finish off a Factory Foreman and is great for extra damage to the Multislacker when he is alone. With good planning and luck, it also helps make it possible to skip a second Wasteful Management phase.
A very strong and very important main damage dealer to the Multislacker when combined with Lure, and could be a good additional boon to Drop's damage and accuracy through the Marked effect. You will want both Throw and Drop for single target damage output. Having both means having a higher stock of single target damage options, meaning higher overall damage potential as well. The former is safer as Lure + Throw relies on only one accuracy roll for the full damage, and if the Throw is Prestige, can also provide some self-healing on top of that.
Rating: 3/3 Stars
As usual for Manager battles, Throw's Prestige is very useful for this fight, allowing you to deal reliable damage while having to spend less of other resources on healing. This is especially valuable if Lure + Throw is used on an isolated Multislacker, as when done the first time, Mandatory Lunch will likely trigger right after, and three Toons will be in better conditions to deal with that. This can also offset some damage taken as the Toons deal with the Factory Foremen during the lunch break.
Essential for enabling Zap to effectively deal with Wasteful Management Cogs and the Factory Foremen, assuming they don't have Soak Resistance. Otherwise very useful as a general long-lasting accuracy buff for Lure, Throw when Marking for Drop, and Drop.
Rating: 3/3 Stars
A very low priority Prestige. The increased splash damage may save a Zap Gag or two during Wasteful Management, but other Prestiges will get far better mileage for having more wide purposes.
Fantastic at effectively dealing with Wasteful Management Cogs and the Factory Foremen, assuming they don't have Soak Resistance.
Rating: 3/3 Stars
Greatly boosts an already great Gag's effectiveness for this fight. The Prestige can enable Zap to destroy higher health Wasteful Management Cogs, and can help save using higher level Zap Gags during Wasteful Management which could then be used instead on the Factory Foremen.
Often not very useful for the Lunch Break phase, but can potentially get the team through Wasteful Management quicker than with other Gags with some softening of Cog HP or disposing of Cogs completely outside of Sound range involved.
Rating: 2/3 Stars
Other Prestiges take much higher priority, and the stronger Encore doesn't make enough of a difference in the general gameplan for this battle.
A very strong and very important main damage dealer to the Multislacker and the Factory Foremen. Very potent when set up for better accuracy through things like the Soaked and Dazed effects and the innate +20% accuracy from each previous Gag that hit the target on the same turn. You will want both Throw and Drop for single target damage output. Having both means having a higher stock of single target damage options, meaning higher overall damage potential as well. The latter is more dependent on setup with accuracy buffs such as Soaked and/or Dazed, but can have a higher payoff in overall damage.
Rating: 3/3 Stars
The Prestige could provide the extra damage needed to finish off a Factory Foreman and is great for extra damage to the Multislacker. With good planning and luck, it also helps make it possible to skip a second Wasteful Management phase.
Rating: 3/3 Stars
3-4 Toons
The Multislacker battle is about using a variety of Gag combos to adapt to and defeat the Cogs aiding him, as defeating them is required in order to get brief opportunities to deal meaningful burst damage to him.
Wasteful Management
If the Skelecogs currently on the field can't be completely defeated, it's generally recommended to let the Multislacker trigger Zero Task instead of Hyper Task. Triggering Hyper Task on multiple Toons will almost always cause more overall damage than Zero Task, and there is little actual pressure placed by this battle to defeat the Skelecogs as quickly as possible. It's unlikely for Zero Task to cause more than one or two Cogs to Overcharge unless it's triggered several times on the same Skelecogs.
Trap and Zap are the most widely usable for dealing with Wasteful Management Cogs.
Cogs with Damage Reduction should be taken out with Trap and Zap due to their high base damage. If you want to use Sound, keep in mind that each Elephant Trunk will deal only 10 damage and each Foghorn will deal only 30 damage against these Cogs. You will often have to soften up these Cogs using other Gags in prior turns in order for Sound to defeat them.
As long as a Skelecog is alive, Wasteful Management will not trigger. Additionally, it triggers at the end of the next turn after it dies. You can use this to your advantage in a manner similar to a strategy for Phase 3 of the High Roller battle. What you can do is:
Keep a weak Skelecog alive at low health
Use Toon-Up if needed
Have at least one kind of accuracy buff prepared so the full turn given to freely attack the Multislacker is less likely to be squandered by Gag misses
Optional, but very helpful: Prepare IOUs. Good IOUs can be but are not limited to: Barnacle Bessie, Cindy Sprinkles, Flippy, and Daffy Don. Drop and Throw IOUs make it more easily possible to completely take out a Foreman on the first turn of Lunch Break, while Flippy and Daffy Don can serve as alternatives to Unites with a cooldown short enough to allow Unites to be ready on the Toons that used the IOUs by the time that Lunch Break starts
Unless it's getting Sued, the Skelecog to be kept alive should not be one with Lure Immunity. When your team is ready, kill the Skelecog with an early track like Trap, allowing up to 3 Toons room to get extra damage on the Multislacker with whatever they want before being granted a full burst damage turn on him.
An alternative strategy involving Sound, that potentially is able to get through Wasteful Management a bit faster, is to use Gags such as Trap or Zap to either completely take out the Cogs from the set that are out of range of Sound, or soften their health for all remaining ones to die to Sound. Then, use Sound to gain Encore, allowing the free turn of burst damage to the Multislacker to be stronger.
If Lunch Break is imminent, Lure + Prestige Throw are recommended to be used on the turn after the last Skelecog dies to put your team in a healthier spot as they head into the Lunch Break phase.
With proper setup and good use, you can potentially skip a second Wasteful Management phase. After Lunch Break, you can repeat the above strategy of leaving one Skelecog alive, utilizing IOUS and/or Encore to further boost your team's damage if needed to get the Multislacker to 0.
Lunch Break
The Foremen can actually remain Lured for 1 turn, assuming they aren't Lure Immune, aren't going to be cleansed of Lure by a Level 20.mgr Foreman, are getting Worker's Compensation, or about to use Union Bust. The option exists to take a turn to Group Lure and Toon-Up to put your team in a safer position before pressing more damage onto the Foremen.
The Level 21.mgr Foreman is the highest priority to destroy first. If it's infeasible for it to be taken out before it can cast Union Bust, destroying as many Skelecogs on the second turn as possible or the other Foreman instead is recommended due to the Union Bust compensation boost being significantly more powerful than the normal one.
While it does prevent its neighbors from staying Lured, Soaked, or Sued, the Level 20.mgr Foreman is the second highest priority among the three Foremen types.
Keep in mind that Focused Defense is not broken by Lure unless that Lure activates a Trap on that Cog. Focused Defense is best dealt with using Trap + Drop or Squirt + Zap.
The ideal Lunch Break set allows your team to simply use Zap for multiple turns, as it is most easily capable of wiping out both Foremen simultaneously. However, using Zap can easily become inadvisable if one or both Foremen have Soak Resistance. See if Trap and Drop or Lure and Throw and can be used instead in those instances.
Sound is undesirable to use in this phase unless you know for sure that the Encore boost is what your team actually needs to be able to wipe out both Foremen, or at least one of them, on the following turn. Otherwise, it will only serve to make the field significantly more hazardous and do little to advance the Lunch Break phase. Any Skelecogs that died will be immediately replaced by new ones and destroying multiple at once will cause the Foremen to gain multiple stacks of Worker's Compensation.
Very dangerous Skelecogs (i.e. high level non-Foreman Skelecogs with Lure Immunity) can be sued. Sues can only be removed when Zero Task Overcharges them or if they're next to the Level 20.mgr Foreman.
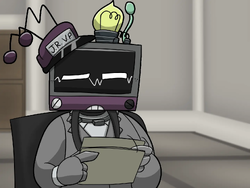
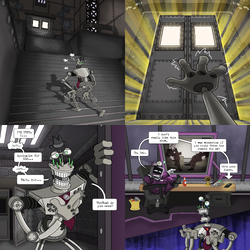
The Toons walk into the Multislacker's office disguised as Cogs, while the Multislacker looks over the camera system.
"Huh?
"Oh, hey there."
"Sorry about the walk, I haven't gotten around to having the elevator fixed."
"It's much easier to just fly here from my dad's office."
"You're Toons, correct?"
The Toons proceed to be undisguised.
"As I thought. Cogs don't just show up somewhere uninvited like that."
"Anyway, I'm assuming you've met my dad."
"He gave me a list of menacing things I was supposed to say to you, but I dropped it somewhere over there."
"Not that it ever helped my dad much, but could one of you, like, go get it?"
The Toons ignore the request.
"Y'know, it'd be probably easier for both of us if you just turned around and left."
"Oh... Yeah... I guess that IS a lot of stairs to go back down."
"Ugh, fine. But let's hurry. My show is on in a few minutes."
Ending Cutscene
"I'm just going to be completely honest with you."
"I find the whole 'Toons vs. Cogs' thing to be kind of pointless."
"You show up here, you wreck my dad, and he just gets repaired and keeps going."
The Multislacker flies over to his chair.
"At the end of the day, we're all just wasting time."
"And no one is better at wasting time than me."
The Multislacker spins his chair towards the cameras.
"Anyway, my show is on now, so you better go."
"I'd advise you to teleport out. There's cameras outside, you'd get caught in an instant."
Wasteful Management
"Any second now..."
Hyper Task
"You probably should've attacked someone else that time."
"My dad would describe this as "aggressive sales tactics.""
"There's more ties where that came from!"
Zero Task
"If you're not going to attack me, then there's no point."
"I can take the hits. Them, not so much."
"I don't have the energy to attack you right now."
Mandatory Lunch
Beginnings:
"I'm not one for talking business during a meal."
"My dad says that the union forces us to take breaks."
Ends:
"Sigh... lunch break over..."
"Thanks for covering for me, guys."
"Sigh... lunch break over..."
"Did you enjoy your break as well?"
"Hmm, maybe I should add more kerosene next time."
"Could you just leave already?"
“Ahh, that hit the spot!"
"Oh, you’re still here?"
Face-Off Taunts
"My dad says that the union forces us to take breaks."
"My show is on in a few minutes."
"You're just trying to mooch off of my cable package."
"I'm assuming you've met my dad."
Death Taunts
"At least you don't have to go down that flight of stairs."
"It's best that you not, uh... I forgot how that was supposed to end."
"Maybe you'll think twice next time about interrupting me."
Surrender Taunt
"Well, back to my shows. If you see my TV remote on your way out, could you toss it over here?"
Friend Request Denials
"I have far better things to do with my time," the Multislacker retorts. "Like watching TV and... other stuff."
"Eh," the Multislacker groans. "You're just trying to mooch off of my cable package."
The Multislacker shakes his head curtly, "Nah."
The Multislacker looks somewhere in the distance: "That's a bit too involved for me."
Attempt to Sue
"Nah, the court's just too far a walk, y'know?"
Attempt to Fire
"Sorry, no way my dad's letting that happen."
Zero Task Responses
"A little too heavy on the gasoline."
"Horrible. I want more."
"Full of bread."
"Where did it go?"
"Ouch."
"Okay."
"Scrumptious."
"Succulent."
"Tolerable."
"Digestible."
"Delicious."
"Delightful."
"Delectable."
"Exquisite."
"Nutritious."
"Palatable."
"That'll do."
Music
Theme
Audio File
Song Title
Lobby Theme
Out of Order
Opening Cutscene Theme
Lazing About
Battle Theme (Base)
Slacker Swing
Battle Theme (Mandatory Lunch)
My Dad Says That The Union Forces Us To Take Breaks
Ending Cutscene Theme
Tuckered Out
Victory Theme
Smiles Swing
Sound Effects
Statement
Question
Grunt
Murmur
Hyper Task
Zero Task
Zero Task Heal
Version History
v1.8.0 BETA
Lowered the damage reduction that Multislacker receives while other Cogs are present to 70% from 90%.
The Factory Foremen now heal for 75 instead of 100 when using Worker's Compensation.
Lowered the level range of Cogs to 9-13 from 10-14.
Tweaked the health of Multislacker's Factory Foremen.
Level 19: 725 -> 650
Level 20: 825 -> 800
Level 21: 925 -> 950
v1.7.0 BETA
Fixed an unflattering camera angle when using Trap or Lure Gags while the Multislacker is on break.
v1.4.4 BETA
"The added randomness with overlapping Foreman abilities and buffs was helpful to the fight's overall replayability, but the Union Bust foreman was consistently much more difficult to create a strategy to take out than sets without this foreman. This change should bring the Union Bust foreman more in line with the others." -Corporate Clash Crew
The Multislacker's Foremen appear to be taking notes from him.
The Union Bust Foreman will now wait 2 rounds to commence Union Busting instead of 1.
Factory Foremen Dodge Rate: 60 -> 55
v1.4.0 BETA
Multislacker is just a little bit lazier than before.
Wasteful Management spawns 5 Cogs instead of 4 the first turn with a cap of 6.
Mandatory Lunch happens once at 60% HP and spawns 2 Factory Foremen instead of 1.
Zero Task no longer unlures and grants an extra attack to the Cog.
Off the Clock gives the Multislacker 90% damage reduction instead of 40% and a 40% damage boost.
Additional Cogs will spawn after a Union Bust.
The Multislacker's Lure Resistance has decreased from 2 -> 1.
Cog capacity has increased from 5 -> 6.
Cog level cap has increased from minimum of 13 -> 14.
The Multislacker's HP has decreased from 4500 -> 3200.
The Multislacker's damage range has decreased from 22-27 to 18-25.
Zero Task healing has decreased from 64 -> 40
Skelecogs with 35% damage resistance has changed to a flat -30 Gag Damage.
The Factory Foremen HP's have been changed:
Level 19.mgr 650 -> 725
Level 20.mgr 725 -> 825
Level 21.mgr 900 -> 925
Overcharged being one of the buffs has been removed.
Fixed a visual bug related to Multislacker's Hypertask.
v1.3.0.8 BETA
Made some adjustments to Union Bust.
v1.3.0.6 BETA
Tweaked the mechanics of some of the effects in the fight.
Additional Cogs will no longer join the battle after the Multislacker has been defeated.
Union Bust applies after 1 round instead of 2.
Worker's Compensation does not apply to standard Cogs killed during the round.
Buffed heal to +175 per Cog, 1.2x damage per Cog, and 1.5x heal cap.
1.3.0 BETA.
A new office has been opened in the Sellbot Towers.
The Multislacker is added to the game.
Trivia
A multislacker is an individual who engages in unproductive activities at the workplace.
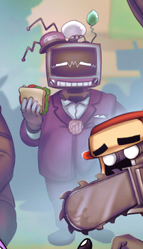
The Multislacker's real name is taken from "Cathode Ray Tube". Similarly, his design is based off of CRT TVs.
The Multislacker is the Senior Vice President's child. He even wears a suit similar to that of his father's.
On the cogs.ink website, the Multislacker's username is bravecogcathal and his password is aaaaaaaaaaaaaaaaaaaa.
The password was revealed as one of the weaker passwords shown on the Password Guidelines page when logging into the website. The username was revealed through both prior knowledge of the Multislacker's real name and was included in the initial batch of usernames given by Mac Opsys during the 1.3.0 ARG.
The Multislacker's Employee ID is a reference to December 1st, 2003, the date that Sellbot Headquarters first released to the test server for Toontown Online.
The Multislacker is the only Regional Manager to receive a decline in HP in terms of playground progression, losing to the Witch Hunter with a 550 HP difference.
Out of the 16 Regional Managers, the Multislacker is the only one who resides in a Cog Headquarters.
The Pacesetter and the Multislacker are the only two Kudos Regional Managers who’s battles don’t end when they are defeated with other Cogs still remaining in battle.
Multislacker has a friend named Gizmo, a little Goon that will often fetch snacks for him.
Attempting to access this Manager's fight without the requirements will result in the following message: "You want to open the door to enter, but you're just too tired."
Gallery
Official art of the Multislacker from the Hires & Heroes key art